Display one or more scaled views of your design on a standard-size drawing sheet
called a layout.
After you finish creating a model at full size, you can switch to a paper space layout to create scaled views of the model, and to add notes, labels, and dimensions. You
can also specify different linetypes and line widths for display in paper space.
As you know, you create the geometry of your model in model space.
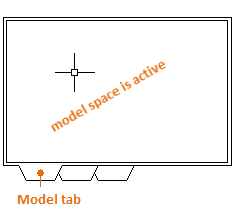
Originally, this was the only space available in AutoCAD. All notes, labels, dimensions,
and the drawing border and title block were also created and scaled in model space.
After paper space was introduced, you could click a layout tab to access a space designed specifically
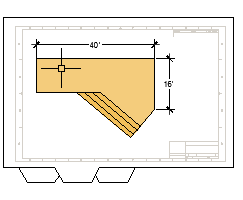
for layouts and scaling. In the following illustration, paper space is active. There
are currently only two objects in paper space: a drawing border block, and a single
layout viewport, which displays a view of model space.
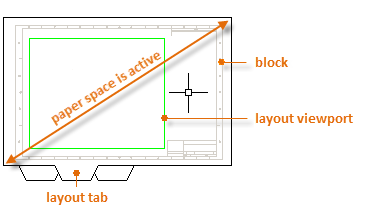
Working with layout viewports is described in more detail later in this topic.
There are four different methods in AutoCAD that are used to scale views, notes, labels,
and dimensions. Each method has its advantages depending on how the drawing will be
used. Here’s a brief summary of each of the methods:
Talk to other AutoCAD users in your discipline about these four methods and why they
chose the method that they use.
The first thing that you should do when you access a layout tab (1) is right-click
the tab (2) and rename it (3) to something more specific than Layout 1. For a D-size
layout, ARCH D or ANSI D might be good choices.
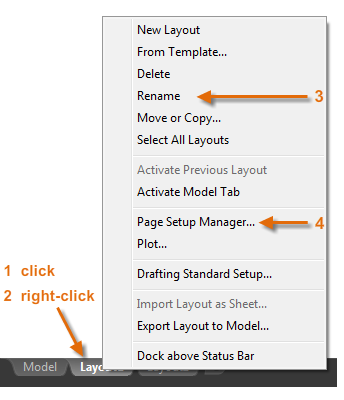
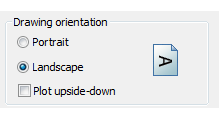
Next, open the Page Setup Manager (4) to change the paper size displayed in the layout
tab.

A layout viewport is an object that is created in paper space to display a scaled
view of model space. You can think of it as a closed-circuit TV monitor that displays
part of model space. In the illustration, model space is active and accessible from
within the current layout viewport.
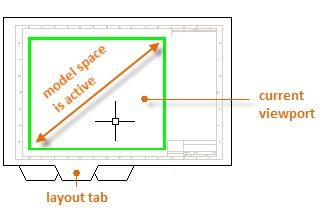
In a layout, when model space is active, you can pan and zoom, and anything else that
you could do on the Model tab.
For example, let’s say that you created a backyard deck design in model space, and
now you want to lay out and print your design from a layout tab.
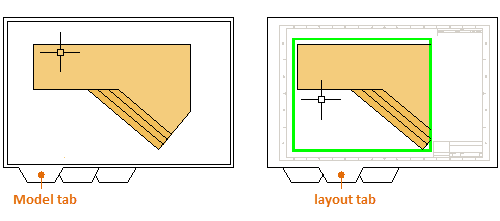
The view in the layout viewport is not yet set to the correct scale.
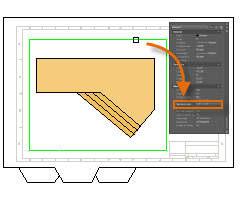
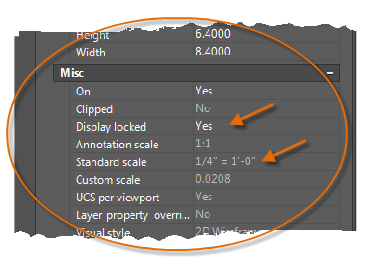
Here are the steps to follow if you use the trans-spatial method of annotating your
drawing:
ickstart your next web project with these example layouts.layouts in XML, including the screen elements that will appear in them and their properties. You could …layout managers, and tells you where to find the how-to page for each layout manager. You can find links for …Layout lets you create one-of-a-kind layouts by remixing your own photos and sharing them with your …Layouts. Starter. Pages. Starter. Examples to introduce components and their function. Theming. Examples of many common UI components, useful for testing …Layout may refer to: Page layout, the arrangement of visual elements on a page. Comprehensive layout (comp), a proposed page layout presented by a …layouts and features for organizing content on screen . Each layout control is described below, as well as details on how to handle …Layout class in Xamarin.Forms is a specialized subtype of View, which acts as a container for other Layouts or Views. It typically contains logic to set the …
بنده سیامک دوستداری فارغ التحصیل رشته مکانیک سنگ از دانشگاه صنعتی اصفهان هستم، و در این وبسایت آموزش های مربوط به نحوه برنامه نویسی در اتوکد و هچنین آموزش تصویری دستورات اتوکد را قرار خواهم داد.
تلفن همراه: ۰۹۰۰۱۲۳۴۴۴۴
ایمیل: s.doostdari@gmail.com